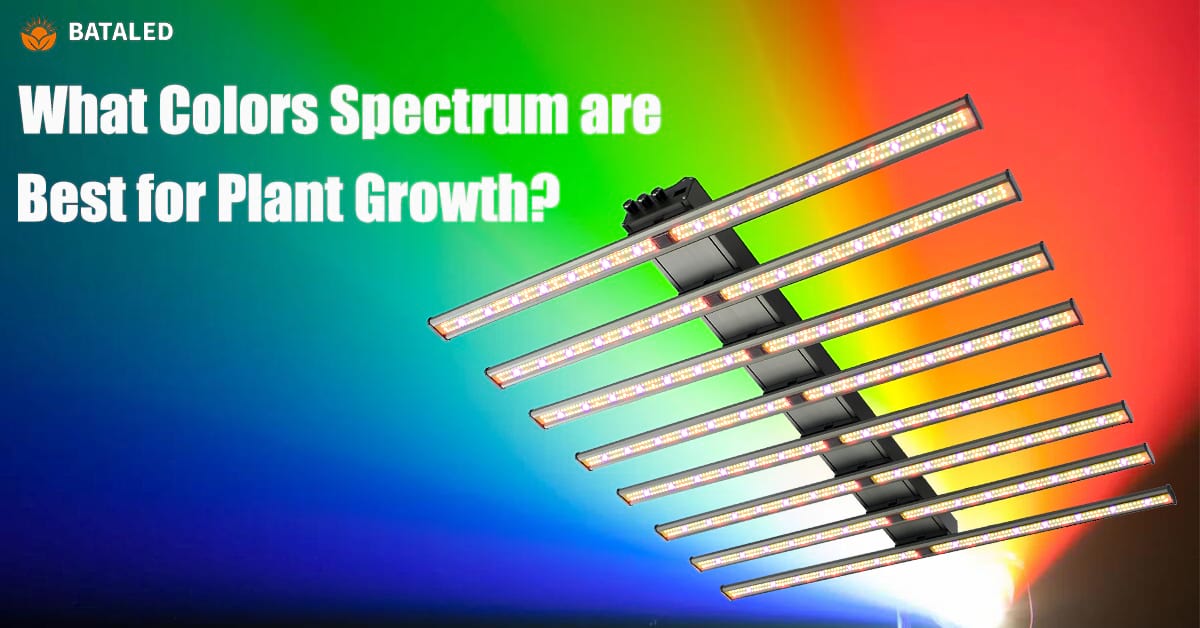
What Kind of Growth Lighting Should Be Best Chosen for the Greenhouse in Winter?
The Winter Light Trap: Why Your Greenhouse Needs a New Strategy
If you’ve experienced a full greenhouse growing season in North America or Northern Europe, you’ve undoubtedly felt that subtle yet familiar sense of frustration. Before autumn even officially ends, your greenhouse tomatoes stop ripening and refuse to change color. That lush, vibrant basil suddenly develops yellowing leaves, and your pepper plants look like someone hit the pause button on their entire existence. The greenhouse is still standing—glass or polycarbonate panels intact—and the sun still streams in during the short daylight hours. Yet, collectively, your plants behave as if they’ve entered an untimely dormancy.
So, what exactly is going wrong here? Put simply, you’ve fallen headfirst into a classic “winter light trap.”
Many people assume that a greenhouse’s primary advantage lies in “trapping heat,” and while that’s certainly true to some extent, it’s not the whole picture. During the winter months, the real bottleneck choking your plants isn’t usually the cold; it’s the simultaneous collapse of both light quality and light quantity.
From November through February, at latitudes north of 40 degrees, the daily sunlight duration can plummet to a mere eight or nine hours, with the sun itself hanging low and skirting weakly along the horizon. A greenhouse supplemental lighting study from Aarhus University in Denmark provides a sobering data point: even on a crystal-clear winter afternoon, the photosynthetically active radiation (PAR) intensity reaching the inside of a greenhouse is roughly only one-third of what it receives during a comparable summer midday.
What does that stark number actually mean for your garden? It means that maintaining an air temperature of 59°F (15°C) inside the greenhouse, while feeling warm to you, is essentially forcing your plants to stay “awake and hungry.” The ambient temperature is high enough to keep their metabolic engines running, but there isn’t nearly enough light energy available to drive photosynthesis and produce the sugars they need to thrive. Over time, the plants are forced to cannibalize their own stored nutrient reserves just to stay alive. Visually, this manifests as leggy, elongated stems with long internodes, thinning and pale foliage, and the dreaded abortion of flower buds before they ever get a chance to open.
There’s also a more insidious and often overlooked issue: the heat paradox of traditional grow lights.
The knee-jerk reaction for many growers is to drag that old, reliable orange-glowing high-pressure sodium (HPS) fixture out of storage. You screw in a 1000-watt HPS bulb, flip the switch, and suddenly the greenhouse feels both bright and warm. It seems, in that initial moment, like a quick fix. But you’ll soon notice your electricity bill climbing faster than a pole bean in June. Moreover, the surface temperature of that HPS bulb can easily exceed several hundred degrees Fahrenheit, which mandates hanging the fixture at least three feet (one meter) above the plant canopy. Get any closer, and you risk scorching those tender new leaves and shoots in minutes.
That enforced mounting height is itself a massive waste of precious light energy. It’s basic physics: light intensity decreases with the square of the distance from the source.
Simultaneously, the tremendous radiant heat generated by that lamp creates a localized high-temperature zone inside the greenhouse, completely disrupting the uniform temperature gradient that your convection currents and thermal screens work so hard to maintain. You’ll end up with an arid, scorching desert directly beneath the fixture while the plants tucked into the corners are still shivering in relative cold. You’re effectively trading one set of problems for a completely different, and often worse, set of issues.
Therefore, what a winter greenhouse truly needs is not “more heat.” It requires a completely new strategy for managing the light environment. The goal is to deliver high-intensity, usable light precisely to every leaf surface without disturbing the fragile microclimate balance that winter growing demands. And that, right there, is the core principle we’re about to dive into.
LED Lights: The Clear Winner for Cold-Weather Growing
Now that we’ve clearly outlined the unique challenges facing a winter greenhouse, the criteria for selecting the right supplemental lighting become remarkably straightforward.
We need a light source that boasts incredibly high efficiency but produces almost no disruptive heat. Ideally, we also want the ability to fine-tune the light spectrum recipe based on the plant’s specific growth stage. When you filter all these requirements down and analyze the options, you inevitably arrive at one answer: LED grow lights. This isn’t about chasing a trendy gardening gadget; it’s about the fundamental physical properties of LED technology being a perfect match for the exact needs of cold-weather greenhouse cultivation.
Let’s start with the issue that plagues winter growers the most: heat management. Traditional high-intensity discharge (HID) lamps, whether they are metal halide (MH) or high-pressure sodium (HPS), are fundamentally sources of thermal radiation. Typically, less than 30% of the electrical energy they consume is converted into visible light. The remaining 70% or more is wasted as infrared radiation and conductive heat.
In stark contrast, high-quality LED horticultural lighting systems boast an electro-optical conversion efficiency generally exceeding 90%. The surface temperature of the LED diodes rarely climbs above 120-130°F (50°C). This cool operating temperature allows you to confidently position the light fixture just 12 to 18 inches above the plant canopy without any fear of burning the foliage.
This reduction in hanging distance means that the photosynthetic photon flux density (PPFD) actually reaching the leaf surface can increase exponentially compared to an HPS light mounted much higher. And you get this boost in light intensity without creating an uncontrolled heat island effect inside your sealed greenhouse. For a well-insulated winter greenhouse, this is virtually the only technological approach that delivers “high light intensity with minimal thermal interference.”
Spectral customization is another ace up the LED sleeve.
We don’t need to delve into overly complex photomorphogenesis theories here. You just need to remember a simple, practical guide to wavelengths:
-
Blue Light (around 450 nm): Think of this as the plant’s “personal trainer.” It signals the plant to direct its energy toward robust leaf expansion and thick, sturdy stem growth. It keeps plants compact and healthy.
-
Red Light (around 660 nm): Think of this as a “reproductive signal.” It triggers the expression of flowering genes, promoting bud differentiation, blossom development, and fruit set.
Traditional fixed-spectrum bulbs force you to accept a one-size-fits-all compromise. However, advanced LED grow light panels almost universally support independent dimming or channel control for blue, red, and white spectrums.
This means that the very same light fixture can be used for multiple purposes across the entire growing season. You can bias the spectrum toward blue light during early spring seedling production to prevent stretching and promote healthy starts. Then, as plants enter the flowering and fruiting stage, you can dial up the red spectrum to boost yield and improve fruit quality. In the deepest part of winter, if you’re simply maintaining leafy greens, you can increase the white light ratio for better visual comfort while you work. One piece of equipment seamlessly handles three entirely different seasonal tasks—a level of flexibility that was nearly unimaginable in the era of legacy lighting technology.
Of course, there’s always the elephant in the room: the initial purchase price of LED fixtures. A 100W full-spectrum LED quantum board does indeed cost more upfront than an equivalent wattage T5 fluorescent tube or a second-hand HPS bulb found on a bargain rack.
But we need to look past that initial checkout price and consider the Total Cost of Ownership over a two-to-three-year horizon.
First, consider lifespan. The rated lifespan of 50,000 hours for most quality LED horticulture lights means that even under the heavy usage of 14 hours per day during winter, the fixture can operate reliably for nearly a decade with light depreciation remaining under 10%.
Second, consider energy consumption. The power draw for the same light output is typically only 40% to 50% of what an HPS system consumes. Using the average residential electricity rate in North America—around 13 cents per kilowatt-hour (kWh)—replacing a 600W HID setup with a 300W LED fixture can save you dozens of dollars in electricity costs over the course of a single winter growing season.
The conclusion is becoming increasingly clear: integrating LED technology into your winter greenhouse setup is not a frivolous upgrade or a luxury purchase. It is a foundational capital investment with an exceptionally high marginal rate of return.
Decoding Light Needs: A Simple Guide for Every Plant Type
Now that we’ve selected LED as the clear direction forward, the next critical questions naturally follow: How much power do I actually need for my greenhouse grow lights? And how many hours a day should I be running them?
If you don’t nail down the answers to these two questions, even the most expensive LED grow light system is nothing more than an elaborate, glowing decoration hanging in your greenhouse. The key to answering them lies not in memorizing complex botany terms, but in understanding exactly what the plants you’re growing are “eating.”
We can divide the common crops found in a winter greenhouse into two broad, practical categories. This division is intentionally simple, but it serves as the most useful guide for determining your lighting strategy.
Category One: Leafy Greens and Root Vegetables — The Low-Light Requirement Group
This group includes lettuce, spinach, kale, arugula, green onions, parsley, and radishes. In their native environments or evolutionary history, these plants are often adapted to partial shade or understory conditions. Their light compensation point is quite low. Even if the light intensity is only one-fifth of a bright summer noon, they can still slowly perform net photosynthesis and accumulate biomass.
For this group, the goal of winter supplemental lighting is “sustained life and slow, steady production” rather than “rapid, forced growth.”
An LED light with a coverage power of 15 to 20 watts per square foot, running on a photoperiod of 10 to 12 hours per day, is more than sufficient to keep these plants looking green, crisp, and healthy inside a winter greenhouse.
Consider a simple comparative trial conducted by the Oregon State University Extension Service: In the cloudy, rainy winter climate of Portland, greenhouse lettuce grown under natural light alone took over 70 days from seed to harvest. The control group that received just 10 hours of low-intensity LED supplemental lighting per day saw that cycle shortened to approximately 45 days. The benefit of additional light is clearly measurable, though for these hardy greens, it’s not a matter of life or death.
Category Two: Fruiting Crops — The High-Light Requirement Group
Tomatoes, peppers, cucumbers, and eggplants—the summer staples we crave during winter—have been evolutionarily shaped to be sun-worshippers. They have very high light saturation points and require a substantial flow of photons to drive the complex physiological processes of flower initiation and fruit sugar accumulation.
Under the severe deficit of natural winter sunlight, without high-intensity artificial supplemental lighting, these plants will enter a state of “light starvation stress.” Even if the temperature is perfect and water and nutrients are plentiful, the plants will simply produce weak, spindly vegetative growth. They’ll refuse to flower, or if they do produce blossoms, those flowers will drop before setting any fruit.
For these high-value fruiting crops, the role of the grow light shifts dramatically from “helper” to “primary source.” The coverage power should be at least 25 watts per square foot, and the daily photoperiod needs to be extended to 14 to 16 hours.
To be more precise, we should also familiarize ourselves with a slightly more advanced but incredibly practical metric: Daily Light Integral (DLI). Simply put, DLI describes the total cumulative amount of photosynthetically active photons that fall on a square meter of growing area in a single day. The unit is moles per square meter per day (mol/m²/d). This number directly dictates the yield potential ceiling for your crops.
The table below provides target DLI reference ranges for common greenhouse crops during winter production.
| Crop Type | Representative Varieties | Target Winter DLI (mol/m²/d) | Recommended Lighting Duration |
|---|---|---|---|
| Shade-Tolerant Greens | Lettuce, Spinach, Kale | 8 – 12 | 10 – 12 hours/day |
| Moderate Light Roots | Radish, Green Onion | 12 – 15 | 12 – 14 hours/day |
| High-Light Fruiting Crops | Tomatoes, Peppers, Cucumbers | 18 – 25+ | 14 – 16 hours/day |
| High-Value Herbs | Basil, Dill, Cilantro | 15 – 20 | 12 – 14 hours/day |
One crucial word of caution: regardless of what you are growing, do not attempt to run your LED grow lights 24 hours a day.
Plants, just like humans, require a “sleep” cycle. During those 6 to 8 hours of uninterrupted darkness, the carbohydrates and sugars produced during the day in the leaves are translocated down to the root system and developing fruits. Furthermore, a host of essential hormonal regulatory processes and cellular repair mechanisms are only triggered in the absence of light. Depriving plants of this dark period might result in a brief, initial burst of rapid growth, but it will inevitably be followed by leaf chlorosis (yellowing), premature senescence, and significant flowering disorders. Respecting the natural circadian rhythm is a fundamental prerequisite for unlocking the full potential of your LED grow light investment.
Smart Setup Secrets: Getting the Most Out of Every Ray
You’ve got the right LED fixture, and you understand the specific light appetite of your different crops. The next step is getting the equipment installed correctly and ensuring it operates at peak efficiency day after day.
This step might seem straightforward, but the details hidden within the installation process often determine whether you’re harvesting a bounty of winter vegetables or just shaking your head at a few leggy, unproductive stems.
Dynamic Management of Hanging Height
While LEDs emit significantly less heat, the light intensity directly beneath the diodes can still be substantial. A simple, practical rule of thumb is the “back of the hand test.” Place the back of your hand right at the top of the tallest leaf canopy and hold it there for about ten seconds. If you feel a distinct, uncomfortable burning sensation, the light is too close. If you feel only a gentle, mild warmth, the distance is generally safe.
However, this test only tells you the “do not burn” limit, not the “optimal efficiency” sweet spot. A more scientific approach involves adjusting the height based on the growth stage:
-
Seedling Stage: Hang the light higher, around 24-30 inches above the seedling tray. This provides a gentle, diffused light that encourages healthy germination without overwhelming the delicate starts.
-
True Leaf Stage: Gradually lower the fixture to a distance of 18-24 inches.
-
Flowering and Fruiting Stage: For light-hungry fruiting crops, you can confidently lower the light to 12-18 inches to push PPFD levels up toward the plant’s light saturation point.
This process requires you to spend just a few minutes each week observing the color and morphology of the newest growth at the top of the plant. Pale coloration or upward curling leaf margins often signal light stress (too much light). Conversely, excessively long spaces between leaves (internodes) indicate the plant is stretching for more light (not enough light).
Light Recycling and Reflection
Many home greenhouse walls are made of clear polycarbonate panels or glass. During the day, this transparency is fantastic for capturing natural sunlight. But at night or on heavily overcast days when your LED grow lights are the main event, those transparent walls become massive escape routes for precious photons.
An extremely cost-effective and efficient method to combat this is to install reflective material on the north-facing interior wall and the lower half of the east and west walls. You don’t need expensive, professional-grade Mylar film. Reflective foam board insulation from the hardware store or even a sheet of thin plywood painted flat white works wonders.
These reflective surfaces bounce photons that would otherwise be lost through the walls right back into the growing zone. This effectively increases the light intensity bathing your plants without adding a single watt to your electricity bill.
Two Critical Winter Maintenance Tips
1. Fixture Cleanliness
During winter, greenhouse ventilation is typically minimized to conserve heat. Combined with soil evaporation and plant transpiration, the relative humidity inside can remain stubbornly high, often between 70% and 80%. In this environment, airborne dust particles and water vapor condensation easily form a thin film of grime on the surface of your LED light lenses.
Do not underestimate this film. Extension resources from several U.S. universities note that just a visible layer of dust can reduce light output by 10% to 20%. You’re paying the same amount for electricity, but your plants are receiving a significantly smaller portion of the meal. This is a losing proposition, and it’s entirely preventable by simply wiping down the fixture lenses with a dry microfiber cloth once a month.
2. Electrical Safety
A greenhouse is a high-humidity environment. All electrical connections, junction boxes, outlets, and timers must be rated for damp locations and properly sealed against moisture. It is highly recommended that you use outlets or adapters with GFCI (Ground Fault Circuit Interrupter) protection. Furthermore, always leave a 20% safety margin on your circuit’s amperage capacity relative to the total load of your LED grow lights. We’re working in a space where water and electricity are in proximity, and safety must always be the non-negotiable top priority.
Crunching the Numbers: Why Efficiency Pays for Itself Quickly
We’ve covered a significant amount of technical ground. Now it’s time to sit down with a calculator and run the numbers on the economic side of the equation—the side that often causes the most hesitation.
I completely understand the hesitation. When you’re browsing online gardening stores and see an LED grow light panel priced at $150 or even $200, and right next to it is a T5 fluorescent tube fixture for $30, the internal debate is real. Is spending that extra hundred dollars really worth it?
My answer is emphatically this: If you plan to operate your winter greenhouse for the long haul, this is likely one of the highest-return horticultural investments you’ll make in the coming years.
Let’s walk through a detailed cost analysis based on a very typical North American backyard greenhouse scenario.
Scenario Assumptions:
-
Growing Area: 4 ft x 8 ft = 32 sq ft
-
Crop Type: Winter Tomatoes and Peppers (High Light Requirement)
-
LED System Wattage: 32 sq ft × 30 watts/sq ft = 960 Watts
-
Comparison HPS System Wattage: 1000W HPS fixture (including ballast draw, approx. 1050 Watts total input)
-
Electricity Rate: U.S. Midwest average of $0.13 per kWh
-
Daily Photoperiod: 14 hours
-
Winter Season Length: 120 days (November through February)
Operational Cost Comparison
| Comparison Item | LED System (960W) | HPS System (1050W) |
|---|---|---|
| Daily Energy Consumption | 13.4 kWh | 14.7 kWh |
| Daily Operating Cost | $1.74 | $1.91 |
| Total Winter Season Cost (120 Days) | $209 | $229 |
On the surface, the difference seems modest—only about $20 more for the HPS over an entire winter. But the real financial story is hidden in two dimensions that are often overlooked.
1. Lamp Replacement Costs Over Time
High-pressure sodium bulbs degrade quickly in terms of spectrum and intensity. For horticultural use, it is recommended to replace HPS bulbs every 6 to 12 months to maintain optimal light output. A decent quality 1000W HPS bulb costs between $30 and $60 each time.
By contrast, the 50,000-hour lifespan of an LED fixture means you likely won’t need to spend a single dollar on bulb replacement for the next ten years or more. Add up those recurring HPS bulb costs over a decade, and you’re looking at several hundred dollars in hidden expenditures.
2. Hidden Costs of Heat Management
We’ve already addressed the significant waste heat generated by HPS lighting and its disruptive effect on the winter greenhouse microclimate. In practice, you might find yourself needing to run additional exhaust or circulation fans to redistribute heat evenly and prevent hot spots. That represents additional equipment purchases and more ongoing electricity consumption. The cool-running nature of LED horticultural lighting eliminates these extra headaches and expenses.
When you amortize these often-invisible costs, the total cost advantage of an LED system over a traditional HID system typically covers the initial price difference within the first two years of operation. From that point forward, the LED system continues to save you money, season after season.
For any gardener committed to enjoying high-yield harvests from their winter greenhouse, this is not an impulsive purchase. It is a carefully considered, rational allocation of assets that pays dividends in both production and savings.
Common Winter Lighting Mistakes and How to Dodge Them
We’ve journeyed together from recognizing the winter light trap to selecting the right LED grow light strategy, and on to understanding how to read your plants’ signals to adjust intensity and duration. We’ve built a complete framework for decision-making and execution.
Now, I want to use this final stretch to highlight a few of the most common pitfalls that trip up growers on this path. By identifying and consciously avoiding these errors, you can sidestep a lot of frustration and ensure your winter greenhouse operation runs smoothly right from the start.
Mistake #1: Hanging the Light Too High
Many beginners, upon unboxing a long, rectangular LED light bar, instinctively hoist it up to the highest point in the greenhouse, hoping to spread the light across the entire space.
While this seems logical, it flies directly in the face of the Inverse Square Law of light attenuation. When you move a light fixture from 12 inches above the canopy up to 48 inches, the photon density reaching the leaves doesn’t just drop to one-quarter; it drops to one-sixteenth. You’re paying for 100 watts of electricity, but your plants may only be reaping the benefit of 6 watts.
The correct approach is to position the fixture as close to the canopy as is safe (just above the burning threshold) and rely on the fixture’s inherent beam angle design and multiple overlapping light sources to achieve wide coverage, rather than relying on increased distance.
Mistake #2: Treating All Crops the Same
It’s common for growers, after installing a new LED system, to treat the entire greenhouse as a uniform light environment. They’ll place tomatoes right next to lettuce, subjecting both to the same intensity and duration of light.
The predictable result is lettuce with scorched, brown leaf edges or tomato plants that are all leaf and no fruit due to insufficient light intensity.
Remember the key dividing line we established: fruiting crops and leafy greens have light requirements that differ by a factor of several times. Where space permits, cluster your high-light-demand fruiting plants directly beneath the fixtures where the PPFD is highest. Place leafy greens and herbs along the perimeter of the growing area or on lower shelves, where they can thrive on reflected and peripheral light. This spatial zoning method is key to maximizing the efficiency of every watt consumed.
Mistake #3: Neglecting the Value of a Timer
Winter days are short and variable. Relying on your own memory to manually turn the greenhouse grow lights on and off at the correct time every single day is both impractical and unreliable.
A simple digital timer that costs less than $20, or a slightly more advanced smart plug, solves this problem entirely and with perfect consistency. You can program the lights to turn on an hour or two before sunrise, prepping the plants’ photosynthetic machinery for the day ahead. They can then remain on for several hours after sunset, ensuring the total Daily Light Integral target is met precisely.
For those who want to take it a step further, controllers with gradual dimming functionality can simulate natural sunrise and sunset transitions, reducing the physiological shock of lights snapping on and off abruptly.
For the vast majority of home greenhouse enthusiasts, however, a simple, reliable timer coupled with regular observation is more than sufficient to fill your harvest basket week after week. I hope this guide has given you the confidence to tackle winter growing head-on, and I look forward to hearing about your greenhouse thriving with vibrant growth.
Final Thoughts
When you strip it all down, winter greenhouse growing is fundamentally a race against the dwindling light. We’ve covered a lot of ground, but the core takeaways are simple and actionable:
-
Insufficient winter sunlight is an unavoidable reality, but with the right strategy, you can turn that seasonal disadvantage into a controlled advantage.
-
LED plant lights stand out as the top choice not because they’re trendy, but because they deliver the specific red and blue wavelengths plants crave directly to the leaf surface with minimal wasted electricity and almost zero wasted heat.
-
Keep that simple dividing line in mind: Leafy greens can get by with modest, supplemental light, but fruiting crops demand serious, precisely delivered light.
-
Invest a little time in adjusting hanging heights, wipe down those lenses once a month, and let a timer handle the schedule. With that minimal effort, you’ll be rewarded with a steady supply of fresh harvests all winter long.
-
That upfront investment in quality LED fixtures will be recouped through lower electricity bills and higher yields, typically within the first two years.
Here’s hoping that this winter, your greenhouse is no longer a dormant, empty shell, but a vibrant, productive sanctuary brimming with green life and fresh flavors.
CATEGORIES
Recommended Post

Where It’s Legal to Grow Cannabis: Ultimate Tips & Cultivation Laws
About Author—Jose Li
Jose, a senior content creator at BATA LED, brings over 5 years of expertise in LED grow light. He delivers valuable insights to help growers and farmers better understand LED grow light technology, empowering them to boost crop yields and quality with advanced lighting solutions.