How to Grow Marijuana Indoors with LED Grow Lights?
Why Modern LEDs Are the Clear Winner for Home Growers
Beyond Energy Bills: The Real Long-Term Payoff
If you are planning or have already started an indoor grow, you have probably noticed that LED grow lights are not cheap. Compared to old-school HPS (high-pressure sodium) or metal halide lights that are still on the market, an LED fixture with equivalent coverage often costs 20–30% more upfront. This price gap tempts many first-time commercial growers and home hobbyists to settle for the cheaper option. But if you stretch your timeline from the initial investment out to the second and third year, the math flips completely. The real payoff of LEDs goes far beyond a lower monthly electricity bill—it is a compound return that factors in equipment depreciation, maintenance labor, and harvest quality.
Let’s start with some simple numbers to frame the concept. In most parts of the United States, electricity averages around
578 per year just in electricity. A modern high-efficiency LED fixture needs only about 650 watts to deliver the same—or even better—photosynthetic photon flux, bringing the annual power cost down to about
236 per light per year, and this does not even count the extra energy gobbled up by the heavy-duty air conditioners and exhaust fans that HPS setups require.
But the long-term return goes much further. High-quality LED fixtures are typically rated for 50,000 hours or more, with extremely slow light depreciation. Running 12 to 18 hours a day, an LED can serve reliably for over seven years without a single lamp change. By contrast, HPS bulbs must be replaced every six to nine months; otherwise, light output drops sharply and yields slide right along with it. For commercial grow facilities—especially continuously operating mother rooms and veg rooms—this translates into far fewer bulb inventories, fewer high-reach labor calls, and less production downtime. Once you factor in replacement labor, equipment downtime, and old bulb disposal costs, the total cost of ownership advantage for LEDs becomes dramatic starting in year two. For home growers, although the absolute dollar amounts are smaller, the freedom from constantly buying replacements and the “do it once and forget it” peace of mind are just as valuable.
| Comparison Dimension | Traditional 1000W HPS Setup (with ballast) | High-Efficiency LED Setup (~650W) | Long-Term LED Advantage |
|---|---|---|---|
| Upfront Purchase Cost | Baseline (lower) | Often 20%–30% higher | Looks more expensive at first, but the math completely flips over time |
| Actual Power Draw | ~1,100 watts | ~650 watts | Over 40% energy savings, heat output drops dramatically |
| Daily Power Consumption (12-hour light) | 13.2 kWh | 7.8 kWh | Saves 5.4 kWh per light per day |
| Annual Electricity Cost per Light (at $0.12/kWh) | Over $578 | ~$342 | Nets ~$236 saved per year |
| Auxiliary Cooling Energy | Heavy-duty AC and strong exhaust required, adding significant hidden power costs | Greatly reduces AC and ventilation cooling demand | Cuts out a huge chunk of hidden electricity costs |
| Lamp Lifespan & Light Degradation | Bulbs must be replaced every 6–9 months, or light output and yields decline noticeably | Rated lifespan ≥50,000 hours, stable service for 7+ years, extremely slow decay | Almost zero lamp replacement, more consistent yields |
| Maintenance & Labor | Frequent spare purchases, ladder work, downtime, and disposal costs add up quickly | Minimal maintenance, virtually no scheduled replacements or downtime | Total cost of ownership advantage becomes dramatic from year two onward |
| Harvest Quality | Old technology, rapid light degradation directly impacts yield | Equal or better PPFD, stable light quality | Guarantees premium-quality output over the long haul |
The “Set and Forget” Advantage: More Growth, Less Tinkering
In the era of HID lights, a grower had to act as a daily “custodian.” You constantly raised and lowered fixtures, tested canopy temperature with the back of your hand, worried that the scorching beam might burn the top buds, or that keeping the light too far away would cause the lower growth to stretch. Switch to modern LEDs, and this high-frequency physical intervention is largely freed up. The “lazy-friendly” nature of LEDs is not really about being lazy—it is about giving back the mental energy that was spent on mechanical tasks and firefighting, so you can focus on reading plant expressions, fine-tuning nutrient recipes, and planning training schedules for the next cycle.
This is all rooted in the inherent light-heat separation of LEDs. Most LED panels dissipate heat through rear heatsinks upward or backward, rather than blasting infrared radiation directly onto plant tissue like HPS does. As a result, even in dense grow racks, leaf surface temperature stays in the ideal photosynthesis range without creating hot spots. You can mount the light closer to achieve higher PPFD without blasting cold AC air directly onto the canopy, which reduces mechanical leaf damage and transpiration imbalance caused by excessive wind speed. In a multi-tier commercial vertical farm, this advantage becomes even more pronounced: each tier can be compressed to just 1.2–1.5 meters (about 4–5 feet), whereas traditional HPS requires at least 1.8 meters (6 feet) of safe clearance. This boosts space utilization by nearly 30%, allowing you to fit an entire extra layer of grow racks in the same floor area—pure profit in annual production capacity.
For small-scale home growers, this “set it and forget it” quality is even friendlier. An LED system with preset hanging height and intensity can run almost undisturbed for weeks after transplanting seedlings, requiring only a minor adjustment or two as plants grow. This is a game-changer for hobby growers who work during the day and can only tend their plants at night: less anxiety, a more stable growth curve. You no longer have to rush home worrying that a brief fan failure has scorched the tops. It is fair to say LEDs have changed not just how we generate light, but how we manage our time as growers.
| Aspect | Traditional HID Era | Modern LED Era |
|---|---|---|
| Grower’s Role | Act as a daily “custodian,” constantly raising and lowering lights, checking canopy temperature | “Lazy-friendly,” largely frees up physical intervention; set it and mostly leave it alone |
| Focus of Effort | Spent on mechanical tasks and high-frequency reactive adjustments | Redirected to observing plant expression, fine-tuning nutrients, and planning training |
| Light-Heat Characteristics | Infrared radiation hits plant tissue directly, often causing localized burning and stretching | Light and heat are separated; heat dissipates via rear heatsink, keeping leaf temperature stable |
| Installation & Space | Must keep a safe distance of at least 1.8 m (6 ft), poor space utilization | Can be mounted closer for higher PPFD, with far less direct AC airflow needed |
| Space Profitability | Baseline reference | Multi-layer vertical farms can compress tier height to 1.2–1.5 m; ~30% more space utilization, adding an extra entire grow layer—pure annual production profit |
| Home User Experience | Worried about coming home to scorched tops, unstable growth curves | Runs smoothly for weeks with only one or two minor tweaks; completely changes time management |
A Safer Choice for Your Home and Plants
If you have spent any time in growing communities, you have heard fire-alarm stories involving kitchens, garages, or basements caused by old lighting. A single 1000W HPS bulb can have a surface temperature exceeding 400°C (752°F). Any dust buildup, fan failure, or damaged reflector can rapidly push local temperatures to dangerous levels. LEDs rewrite this risk equation from the ground up. Their low infrared output and modest overall temperature rise make them the most “passively safe” lighting solution for commercial facilities and home grow spaces alike—yet this point is often glossed over amid the loud conversation about economic benefits.
When the light source is no longer a high-temperature ignition hazard, fire separation and code compliance become much easier. In a compliant commercial grow, switching to all-LED can relax the required safe distance between grow rooms and electrical panels, and allow more economical wall materials to replace expensive fire-rated drywall. Some municipal authorities in North American cities even offer lower inspection frequency or insurance premium discounts for fully LED-lit facilities—still not a universal policy, but the trend is clear. For a residential grow tent, whether in a Colorado basement or a spare bedroom in Michigan, using LEDs means that even if the exhaust fan fails, room temperature will not skyrocket to the point of igniting nearby materials. That kind of passive safety margin is something you simply cannot put a price tag on.
On a microscopic plant level, lower heat radiation also benefits cuticle development and volatile terpene retention. The intense infrared from HPS accelerates moisture loss from leaf surfaces, causing some terpenes to evaporate prematurely, which dulls the complexity and staying power of the final aroma. LED light quality is closer to diffused light, which reduces leaf heat stress and helps the plant preserve more aromatic compounds. This difference has been confirmed repeatedly in third-party lab terpene profile analyses, and is one reason many high-end craft and boutique growers have fully switched to LEDs in recent years.
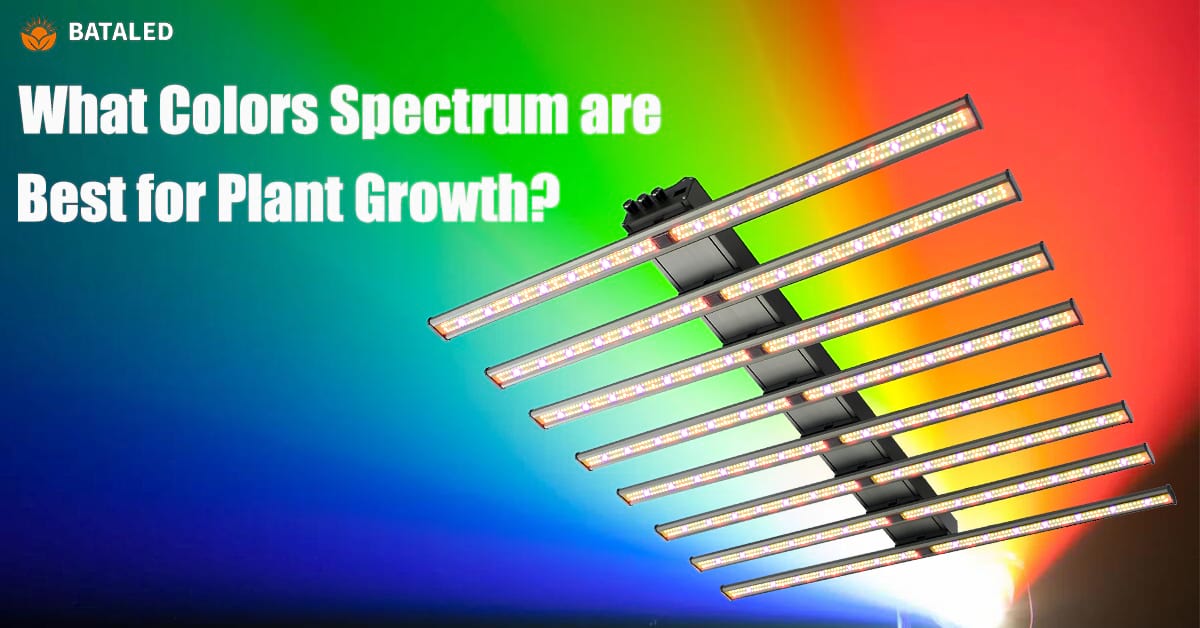
Decoding the Light Your Plants Actually Need
The Two-Minute Spectrum Guide: Blue for Body, Red for Fruit
When you talk to any professional lighting supplier, you will hear a dizzying string of terms: full spectrum, broad spectrum, far-red, UV-A. But at its core, a plant’s interpretation of spectrum is remarkably simple:
-
Blue light is like the high-angle midday sun of midsummer—strong short-wave energy punching through the ozone layer. When a plant receives this signal, it activates genetic pathways responsible for stem and leaf growth, resulting in thicker stalks and broader leaves.
-
Red and far-red light mimic the warm, low-angle sunlight of autumn. They tell the plant that summer is over and it is time to shift energy from growing bigger to reproduction—flowering and setting seed.
This “blue for leaves, red for fruit” framework is the best starting point for choosing or programming any tunable LED grow light.
Modern white-light LEDs actually cover the full visible spectrum on their own, with plenty of blue content—enough to carry a plant through an entire growth cycle. But if you want to further optimize plant structure and yield, you need to emphasize specific wavebands at specific stages.
For commercial projects, during the vegetative stage you can select fixtures with a higher color temperature (e.g., 5000K–6500K) or engage blue-enhanced channels to keep internodes compact and the canopy even, making mechanical trimming and side lighting placement easier. Once you flip to the flowering stage, switching to a mix with more red (around 660 nm) and even far-red (around 730 nm) accelerates flower initiation and gently uses the “shade-avoidance effect” to guide plants through an even stretch during the first two weeks of transition, avoiding hollow lower and middle layers.
It is worth mentioning that green light is often overlooked. Research shows that adding a moderate amount of green light (ideally no more than 25% of total photon flux) to a red and blue base can penetrate upper leaves more effectively, driving photosynthesis deeper into the canopy, while also helping maintain healthy water use efficiency. These findings are extremely practical for growers chasing the highest medical-grade quality.
Light as a Clock: Mastering the Vegetative and Flowering Light Cycles
Spectrum gives plants direction and rhythm, but day length acts as a precise internal calendar. Cannabis is a classic photoperiod plant—it does not flower automatically when it reaches a certain age, but decides to enter the reproductive phase by measuring the number of uninterrupted dark hours it receives. Disrupt that internal clock, and even the best genetics and a perfect feeding program can leave you empty-handed. That is why controlling the light timer is more fundamental than obsessing over fixture brands and chip types—yet it is often overlooked by growers eager for results.
The standard vegetative light schedule is 18 hours of light and 6 hours of darkness, although some growers run 24 hours of light. The 18/6 schedule gives plants ample photosynthesis time while providing a short dark period to repair minor light damage and reduce energy use. Many medium-to-large mother plant greenhouses in Europe run an 18/6 cycle, using those 6 hours of lights-off to perform environmental control system maintenance and equipment checks, which actually streamlines workflow. Only highly automated rapid-propagation labs commonly run 24/0 to maximize node expansion speed. When plants reach roughly half their expected final height, you need to switch to a 12-hour light / 12-hour completely dark flowering cycle. That 12-hour dark period must be continuous and absolute; any interruption can trigger re-vegging or cause female flowers to develop male pollen sacs—a major problem. In some compliant production facilities in Germany and the Netherlands, growers install double interlocked doors at the flowering room entrance to prevent hallway light from invading when the door is opened. For home growers, a reliable mechanical or digital timer, plus covering tent zipper gaps and power indicator lights with black tape, solves this risk at almost zero cost.
| Growth Stage | Light Schedule | Core Purpose & Key Notes |
|---|---|---|
| Vegetative (seedling to ~half final height) | Commonly 18 hrs light / 6 hrs dark (some use 24/0) | • 18/6: Ample photosynthesis with a short dark period to repair light damage, cut energy use, and allow equipment checks. • 24/0: Fastest node expansion, requires high automation. |
| Flowering (switch when ~half final height is reached) | Strict 12 hrs light / 12 hrs complete darkness | Cannabis measures continuous hours of darkness to trigger flowering. Darkness must be unbroken; any light leak can cause re-vegging or hermaphroditism. |
| Core Principle & Risk Control | Timer control is more fundamental than brand choice | • Commercial: Use double interlocked doors at flowering entry to block hallway light. • Home: Use reliable timer, cover tent zipper seams and indicator lights with black tape. |
How Much Light Is Too Much? Understanding “Light Pressure”
Many beginners intuitively treat photosynthesis as a simple linear equation: pump in more photons, make more sugars, and harvest more buds. That is true up to a point, but beyond a threshold, the equation flips. When the light energy absorbed per unit time exceeds the processing capacity of the photosynthetic electron transport chain, the excess energy starts attacking the chloroplasts themselves, causing a sharp drop in photosynthetic efficiency—this is photoinhibition. Because modern LEDs produce very little radiant heat, the old-school “if the back of your hand feels hot, the light is too close” warning no longer works. Growers now have to face an invisible variable: light pressure.
The standard metric for photosynthetically active radiation is PPFD, measured in micromoles per square meter per second (µmol/m²/s). Based on numerous replicated trials and commercial feedback, at ambient CO₂ levels a vegetative-stage PPFD of 400–600 µmol/m²/s is plenty; excessive light can trigger leaf curling and bleaching. During flowering, you can gradually increase to 600–1000 µmol/m²/s. However, if you push PPFD beyond 1000, you must supplement CO₂ to 800–1200 ppm and raise ambient temperature to 28–30°C (82–86°F); otherwise, photosynthetic rate plateaus and you are simply wasting electricity. Even more critical is the Daily Light Integral (DLI)—the total number of photons accumulated in a day. For cannabis, if DLI exceeds 40 mol/m²/day, yields do not increase further, and persistent mild stress can actually lower terpene content. For commercial growers, investing in a PAR sensor to map light distribution across the entire grow area is essential, ensuring even coverage to edges and corners while preventing hot spots in the center. Home growers can replace instruments with a simple rule: if you see top leaves beginning to bleach or internode spacing at the canopy becoming abnormally short, that is a clear signal of excessive light pressure—raise the light or dim it immediately instead of waiting for the plant to adjust.
| Key Metric | Recommended Range / Threshold | Core Takeaway |
|---|---|---|
| Vegetative PPFD | 400–600 µmol/m²/s | Ample at ambient CO₂; higher values can cause leaf curling and bleaching |
| Flowering PPFD | 600–1000 µmol/m²/s | Beyond 1000, must add CO₂ (800–1200 ppm) and raise temps to 28–30°C, or it is wasted energy |
| Daily Light Integral (DLI) | Do not exceed 40 mol/m²/day | Beyond this, yield stops increasing and terpenes may drop |
| Light stress signals (without meters) | Bleached top leaves, abnormally short canopy internodes | Clear sign of excessive light pressure; raise or dim lights immediately |
| Must-do for commercial grows | Use a PAR sensor to map light distribution | Ensure edges and corners receive adequate light, avoid center hotspots |
| Key mindset shift | Photosynthesis is not linear; beyond a threshold, excess energy attacks chloroplasts and efficiency plummets | LEDs run cool, so “hand feeling for heat” no longer works—you must manage photon pressure directly |
The Art and Science of Light Placement
The Golden Rule of Distance: Start High, Watch, and Lower Slowly
Almost every LED fixture manual lists a recommended hanging height range, but any experienced environment manager knows that manufacturer numbers are just a starting reference, not a rigid playbook. Whether you are dealing with fresh transplants from a seedling tray or mature plants moved into a new flowering room, plants need a gentle acclimation period—not just for temperature and humidity, but for light as well. So when installing lights for the first time or starting a new batch, the safest and most often-repeated advice among veterans is: start 15% higher than the manufacturer’s recommendation, then watch, and lower slowly in small steps.
In practice, you can standardize this into a series of steps. For the flowering stage, if the manufacturer suggests 30 cm (12 inches) from the canopy, start by hanging the light at 40 cm (16 inches) and let it run for two days, giving plants time to upregulate protein expression in their photosynthetic reaction centers. After two days, lower the light by 2–3 cm (about an inch) and continue observing leaf posture and color. Ideally, you will see broad, flat leaves with even color transition from veins to margins and no upward curling or obvious pale patches. If leaf edges begin to lift slightly, or new growth near the top starts yellowing or bleaching, PPFD has exceeded that plant’s current tolerance. At that point, do not rush to keep lowering—pause or even raise the light back up. This method of reading plant body language to fine-tune distance is especially valuable in mid-sized commercial facilities processing large batches, helping to avoid whole-zone light stress events. Home growers can boil it down to an even simpler mantra: when in doubt, hang it higher. A plant may stretch from slightly low light, but it will not die; a single too-close blast of intense light can cause irreversible leaf tissue necrosis within eight hours.
The “Leaves Dancing” Test: Using Plant Body Language to Find the Sweet Spot
Walk into a well-managed cannabis grow room, and the first thing you will often notice is a distinctive sight: the entire canopy of leaves is not static, but constantly quivering in a steady, gentle airflow, like being stroked by invisible waves. This “leaves dancing” state is not just aesthetically pleasing—it is an outward expression that multiple environmental variables are in balance. Constant slight leaf movement means air exchange is adequate to supply CO₂ for photosynthesis while carrying away the moisture that builds up in the leaf boundary layer, preventing the kind of microclimate that breeds powdery mildew or botrytis.
To turn this into an operational procedure, first make sure circulation fans are laid out properly:
-
In a commercial grow rack, place one small oscillating fan every 1.5–2 meters (5–6.5 feet), angled slightly downward to create thorough air movement across the canopy without dead zones.
-
You can use a lightweight tissue held at different heights to test whether airflow is continuous.
-
Next, when light distance is adjusted so that most leaves show that gentle dance, it signals harmony among light intensity, leaf surface temperature, and transpiration rate.
-
If light is too intense or fixtures are too close, even with proper wind speed, you will see leaves stiffen or adopt a “praying” posture (leaves folding upward)—and the dance disappears.
This visual check requires no expensive equipment, but it does ask the grower to build a multi-variable mental model of the space. Once you learn it, a single glance across the room tells you which row’s light distance needs tweaking and which circulation fan needs a new angle. It applies equally to a home tent and can be taught as a standardized in-person QC method for large production teams.
The One Mistake Even Pros Make: Why Complete Darkness Is Sacred During Flowering
Among all the variables in indoor cannabis cultivation, there is one iron rule so simple everyone understands it, yet so unforgiving that a single violation can be irreversible: when plants enter their 12-hour dark period, that darkness must be absolute and without any breach. Even a sliver of hallway light creeping under a door, or a pea-sized green power indicator on a humidifier—if it falls on the same leaf regularly each night—is enough to disrupt the conversion rhythm of phytochrome and confuse hormone signaling. The result can be partial re-vegging of some branches, or invisible male stamen clusters forming inside the flowers, seeding the entire batch and turning commercial A-grade flower into extraction-only trim.
The method for checking darkness integrity is surprisingly simple, yet often skipped. During the flowering room’s dark cycle, turn off all equipment, stand in the center for five minutes until your eyes fully adjust to the darkness, then slowly scan every direction. Any speck of light you can detect with your bare eyes can accumulate over eight hours into a signal strong enough to disturb the plants. Some growers carry a white sheet of paper to reflect faint light, making hidden sources easier to spot. Light-proofing must cover every possible path: add magnetic seal strips along door edges, weigh down tent skirts with heavy objects, cover power indicator lights with black electrical tape, and even build removable cardboard shields for dehumidifier LCD panels. For commercial facilities, a more worthwhile investment is a double-door airlock entry—staff must ensure one door is fully closed before opening the next. This low-cost design fundamentally eliminates light leak risk from human error, and the yield it preserves often pays back the entire retrofit cost within the very first cycle.
Beyond the Top Canopy: How Side Lighting Unlocks Your Plant’s Full Potential
In nature’s competition for light, plants evolved a strong drive to reach upward for top light. But in an artificial environment, if you only have a single light source directly overhead, a dense canopy acts like an umbrella, intercepting more than 90% of the photons and leaving only a meager amount of scattered light for the middle and lower plant. Loose lower buds, dull color, and uneven maturity are classic symptoms of a single-overhead-light structure. Introducing side lighting is not just about cramming in another fixture—it is about reshaping light distribution at the anatomical level so that every viable flower node receives enough energy to drive full development.
For practical setup, mount several narrow LED light bars vertically along both sides of the plant row, with a spectrum focused on blue and a moderate amount of red. Blue’s short wavelength helps keep side branches compact, preventing them from becoming lanky and soft as they reach for top light. The vertical center of the side light bars usually aligns with the lower third of the plant’s final height, and gradually moves up as the plant stretches. Commercial multi-tier setups take side lighting even further: they install a full panel of custom LED side lights along the underside of each shelf, controlled by separate circuits. Early vegetative growth emphasizes blue, while mid-to-late flowering mixes in more warm-white and deep red to simultaneously ripen lower buds. Some advanced cultivation operations in North America have made this top-plus-side lighting approach standard operating procedure, reporting a 25% to 35% increase in yield per square foot. Because lower bud quality improves dramatically, batch uniformity increases so much that grading work on the final packing line is cut in half. For home growers with limited tent space, an affordable upgrade is to hang two T5-style LED plant lights with individual reflectors on the inner tent walls—this alone can noticeably boost lower bud density and resin coverage. It proves a key point: what often limits yield is not total fixture wattage, but spatial light distribution efficiency.
Building Your Indoor Setup: A Practical Roadmap
Planning Your Grow from Harvest Day Backwards
Many growth plans descend into chaos halfway through not because of a lack of skill, but because they lacked a backwards plan from the finish line from the very start. When we decide to grow a crop of cannabis, the first image in our heads is usually heavy buds and trim day, not a specific calendar date. Professional project planners, however, pin the harvest week on the calendar first, then work backwards based on strain descriptions, facility capacity, and market windows to calculate the day the 12/12 light cycle must start, which then locks in transplant, cloning, and even mother plant pruning dates. This harvest-day-backwards method acts like an invisible thread, tightly weaving together your nutrient program, training rhythm, and labor schedule.
Imagine a typical indoor facility in Oregon: the goal is to finish drying and enter curing the week before Thanksgiving to hit the year-end consumption peak. The chosen strain has a 9-week flowering period, so you must start 12/12 right around mid-September. Based on mother plant growth rate and planned plant size, vegetative time usually takes 3–5 weeks, which means transplanting must be done by late August. Back up further, rooting cuttings takes 10–14 days, so the latest date to take cuttings from mother plants is early August. Layer by layer, you can map out the entire year on a Gantt chart, clearly showing each room’s occupancy windows and sanitation gaps. For home growers, backwards planning is just as useful but simplified: “What month do I need finished product?” Then subtract three to four weeks for drying and curing, subtract flowering days, subtract vegetative days, and you arrive at your seed-start date. This seemingly simple linear time exercise eliminates an enormous amount of anxiety in practice and forces you to honestly assess whether you have continuous caregiving time over the next three months before you buy seeds and fire up equipment.
| Timeline Step (Oregon facility example) | Home Grower Simplified Version | |
|---|---|---|
| ① Anchor harvest week | Target: Finish drying and enter curing the week before Thanksgiving to hit year-end demand | Decide “which month you need finished product” |
| ② Subtract flowering period | 9-week flowering → Start 12/12 mid-September | Subtract drying/curing 3–4 weeks → Subtract strain flowering days |
| ③ Subtract vegetative period | 3–5 weeks vegetative → Transplant by late August | Subtract vegetative days → Get seed-start / launch date |
| ④ Subtract propagation period | 10–14 days rooting → Take cuttings early August | Arrive at actual starting date for hands-on work |
| Core Logic & Tool | Use a Gantt chart to map each room’s occupancy and sanitation gaps, keeping annual production rhythm clear and controllable | Before buying seeds and starting equipment, honestly assess whether you have continuous care time over the next three months—removes anxiety |
Essential Gear That Saves You Money From Day One
A complete indoor LED grow system is about much more than the light fixture itself. The gear that seems like an extra expense often pays for itself within the first grow cycle simply by preventing one major loss. Among these, there are three non-negotiable foundational investments for growers of any scale: a properly sized grow tent or compartment with high-reflectivity inner walls, a timer that can control down to the minute, and a carbon filter matched to your exhaust fan. These three items respectively protect your light environment stability, photoperiod accuracy, and the stealth and safety of your entire operation.
Grow tents are not just for small-scale use; many commercial pre-processing rooms use modular tents to create independent propagation and breeding zones that are highly mobile and can be quickly reset. High-quality tent liners typically use diamond-pattern reflective polyester film, which redirects side-spilled photons back toward the canopy, giving the same watts 10% to 15% more effective photon utilization compared to an open space. The timer is the nerve center of the light cycle; in a commercial multi-point setup, a digital astronomic timer with battery backup is strongly recommended—it keeps internal time memory even during brief power outages, preventing cycle chaos caused by power flickers. In North American and European markets, a carbon filter is practically standard equipment, because in tightly regulated areas or dense neighborhoods, even a faint wisp of the signature odor can bring unwanted attention. When selecting a fan and filter, make sure the fan’s CFM rating exceeds the effective volume of your tent or room; as a baseline, you want at least one full air exchange per minute, and then add a 30%+ margin to compensate for filter resistance. Supplementary must-haves include a waterproof pH meter, a digital thermo-hygrometer, and a digital scale precise to the gram. Combined, they cost less than the financial hit from one severe nutrient pH imbalance that tanks your yield—making them among the smartest upfront investments you can make.
The Critical First Step to Avoid Killing Your Seedlings with Kindness
Every year in growing communities, the same script plays out: an enthusiastic beginner places a freshly sprouted seedling with its cotyledons into a large final pot, fills it with amended soil, waters with a nutrient solution, and cranks the expensive LED to full brightness, waiting with high hopes. Three days later, the leaves turn from green to yellow, edges look burnt, and the stem goes limp. The culprit is almost always the same: too much love. During the first one to two weeks after breaking ground, a seedling’s root system cannot handle high salt concentrations, and its leaves are nowhere near developing the cuticle thickness and pigment density needed to withstand intense light. At this stage, restraint matters more than input.
The correct starting procedure can be treated like a standard operating template. First, fill seedling trays or small pots with a loose, low-nutrient base medium—such as 70% coco coir mixed with 30% perlite, or a dedicated seed-starting mix. For the first five to seven days, water only with plain water pH-adjusted to around 6.0, allowing roots to colonize the medium rapidly in a stress-free environment. When the first set of true leaves is fully expanded and you see tiny bumps where the second set of true leaves is emerging, start feeding—but at no more than one-quarter of the label-recommended strength. Many commercial propagation centers use continuous ultra-low concentration (EC around 0.4–0.6 mS/cm) sub-irrigation to keep the medium evenly moist without waterlogging. For light, keep your LED at least 30 inches (about 75 cm) above seedling tops, or dim the fixture to around 30% output. At this stage, what matters more than light quantity is keeping ambient temperature stable at 24–27°C (75–81°F) and relative humidity around 70%. Placing a clear humidity dome over the tray creates a mini greenhouse effect, but you must lift it for a few minutes daily to vent and prevent fungal disease. Survive these two weeks, and you will have a batch of young plants with robust roots and stout stems, fully capable of handling the increasingly intense environment that follows.
From First Leaf to Final Harvest: Simple Steps to a Premium Yield
The Two Key Transition Windows That Maximize Your Results
Over a full grow cycle that spans three months or more, daily watering, feeding, and climate control set the baseline. But two pivotal moments—one in the middle and one near the end—act as levers that determine the ceiling for both yield and final product quality. The first is the day you decide to flip the switch, changing your light schedule from 18 hours to 12 hours to initiate flowering. That single action triggers more than a physiological shift; it sets off an irreversible chain of spatial and morphological changes. The second window arrives in the final week before harvest, when you stare at trichomes shifting in color and must decide whether to cut now or wait a few more days. These two windows correspond to maximum yield potential and peak quality, respectively.
For the first transition window, the time-tested “half-height rule” is still the most effective rule of thumb. After switching to a 12/12 light cycle, most cannabis strains undergo a rapid two- to three-week stretch, generally ending up 1.5 to 2 times their pre-flip height. So when your plants have reached half of the available vertical space—factoring in a safety distance of at least 30 cm (12 inches) from the light’s highest possible hang point—that is your trigger to flip. In commercial production, vegetative time is standardized around this height so that at the end of stretch, the canopy consistently lands right at the golden sweet spot under the lights. Along with the flip comes a final heavy defoliation and low-stress training session to ensure the canopy forms a level, dense array of bud sites once stretch finishes. That flat canopy structure dramatically improves light distribution uniformity, eliminates the risk of a single tall top getting burned, and prevents side branches from being left in the shade and underproducing.
Timing the Perfect Harvest: It’s All in the Tiny Crystals
No lab analysis can fully replace what you see through a 30x or 60x jeweler’s loupe. When the frost-like glandular trichomes on the calyx surface slowly shift from crystal clear to milky white, and then from milky white with hints of amber, the plant’s chemical profile is dancing its final dance. These tiny bulbous glands are miniature factories for cannabinoids and terpenes; their color directly reflects the oxidation and degradation state of the resin inside. Different color stages map almost perfectly to distinct consumption experiences and commercial positioning.
Generally speaking, if you are after an energetic, head-focused high, harvest when the vast majority of trichome heads are still plump and milky white, and the pistils (stigmas) are about 60–70% brown and curled. At this point, THC is near its peak, and the terpene profile is at its most vibrant. If you lean toward a deep, relaxing body effect, or are targeting the medical pain-relief and sleep-aid market, let the plants go another five to ten days until roughly 20–30% of the trichome heads have turned amber. During this time, some THC degrades into CBN (cannabinol), which has a more pronounced sedative effect. Commercial facilities often harvest a single room in batches or pull different plants at different times to supply products aimed at different market segments. After harvest and a rough trim, slow-dry the buds in a completely dark space at 18–20°C (64–68°F) and about 55% humidity for at least 10–14 days, until small stems snap cleanly rather than bending with a fibrous strand. Finally, transfer the dried buds into sealed glass jars and cure them at 58–62% relative humidity for at least two to four weeks. During this cure, remaining chlorophyll breaks down, and terpenes further esterify and meld, transforming the flavor from raw, grassy notes into something smooth and full. Curing is the final step that gives premium cannabis its soul—and it is the true dividing line between craft-quality flower and fast-moving commodity bud.
| Growth Stage | Recommended PPFD (µmol/m²/s) | Daily Light Duration | Hanging Distance Starting Point (from canopy) | Environmental Tip |
|---|---|---|---|---|
| Seedling | 200 – 400 | 18 – 24 hrs | 24 – 36 inches (60–90 cm) | Temp 24–27°C (75–81°F), humidity 70%, feed at 1/4 strength |
| Vegetative | 400 – 600 | 18 hrs (common) | 12 – 24 inches (30–60 cm) | Begin training and shaping; use the “leaves dancing” test |
| Flowering (early) | 600 – 1000 (no CO₂ enrichment) | 12 hrs light / 12 hrs complete darkness | 16 – 36 inches (40–90 cm, raise gradually) | Absolute darkness; apply the “half-height rule” at flip |
| Flowering (late) | 1000 – 1500 (requires CO₂ ≤1500 ppm) | 12 hrs light / 12 hrs complete darkness | Keep top buds safe from burn | Temp can rise to 28–30°C (82–86°F); increase ventilation |
| Cloning / Cuttings | 200 – 300 | 18 hrs | Start at 24 inches, move closer slowly | High humidity (80%+); prioritize root stimulation (no nutes until rooted) |
The Main Players: Matching Light Types to Your Goals
Alright, once you have a solid handle on your closet dimensions and heat situation, we can finally talk about the lights themselves. There’s a ton of jargon out there, but when it comes to grow lights that actually work inside a closet, it really comes down to three main types. I’m not going to throw a bunch of headache-inducing spectrum charts or efficiency numbers at you. Let me describe them in a much more straightforward way: each type of light solves a different problem. Some save you money, some save you headaches, and some save you physical space. It all depends on which problem you most want to solve right now. Let’s lay out the strengths and weaknesses of all three.
LED Grow Lights: The Modern Go-To for a Reason
If I had to give a “standard answer” for closet growing, LED grow lights absolutely deserve the crown. This isn’t marketing fluff — it’s the natural choice forced by the unique environment of a closet. The single biggest strength of LEDs is their low heat output. At the same brightness level, they run far cooler than older light types, which is a total lifesaver for a stuffy wardrobe. Plus, LEDs are highly energy-efficient, so the monthly electricity bill looks a lot friendlier.
However, here’s a counterintuitive insight I really want you to remember: in the specific context of a closet, more wattage is definitely not better. Many beginners fall into the reflex of thinking a higher-wattage light will automatically perform better, but in a closet, the opposite is true. Experienced indoor growers have observed a clear pattern: for the vast majority of home grow closets, once an LED’s actual power draw exceeds roughly 400 watts, you hit a noticeable efficiency tipping point. What does that mean? Your electricity bill keeps climbing, the heat from the fixture becomes harder and harder to manage, but the yield boost your plants get from that extra light becomes smaller and smaller — cost-effectiveness falls off a cliff. Even worse, the heat from high-wattage LED grow lights forces you to upgrade your exhaust system, making fan noise louder and bulky equipment devour precious closet space. The whole thing spirals into a vicious cycle of endless upgrades. So, in a closet, knowing when to stop with LEDs is much smarter than chasing “the biggest and best.”
Fluorescent Lights (T5 & CFL): The Budget-Friendly and Flexible Choice
If your budget is tight, or you just want to start seeds and grow leafy greens in your closet without planning any large-scale flowering or fruiting projects, fluorescent grow lights still get the job done — and they do it reliably. T5 tubes and compact fluorescent lamps (CFLs) served countless indoor plant growers long before LEDs took over, and they still have two unique advantages that LEDs can’t easily replace.
The first advantage is how incredibly easy they are to maintain. Imagine this: one of the diodes on your LED panel burns out. What do you do? Most likely, you contact customer support, pack the whole panel up, ship it back, and wait a week or two. But if you’re using T5 fluorescent tubes, and a tube burns out? You walk to the hardware store, spend a few bucks on a new tube, come back, and twist it in — you’re back up and running in under half an hour. That “swap and go” convenience is a real stress-saver over a long grow cycle.
The second advantage is unmatched lighting flexibility. An LED panel is usually a single fixed-size board with a relatively fixed coverage footprint. But CFL bulbs are individual, independent light sources. When you spot a dark corner in your closet where a plant is lagging, you can simply buy a cheap CFL bulb, screw it into a clamp light, and give that “underachiever” some targeted side lighting. This “fill-the-gap” flexibility is something all-in-one light panels simply cannot match. So don’t write off fluorescent lights as outdated tech — in the face of specific needs, they remain a solid and affordable grow light choice.
HID Lights: Why They’re Generally a “No” for Closets
When it comes to HID lights — High-Pressure Sodium or Metal Halide — I have to be crystal clear: for closet growing, just cross them off your list right now. I admit HID lights were once the undisputed gold standard in commercial growing and for pros with dedicated grow rooms, thanks to their intense light penetration and excellent flowering performance. But in a closet setting, every one of those “advantages” turns into a disaster.
The reason is one word: heat. HID lights work like a mini sun, emitting a staggering amount of infrared heat. Hang an HID light in a closet that’s just a few square feet, and I’m not exaggerating — it’ll turn into a drying oven in under half an hour. To fight that heat, you’d have to install a loud, powerful exhaust fan that roars enough to betray your secret; you’d need to vent hot air outside, which often means cutting holes in walls; and if it’s summer, you might even need a portable air conditioner. You originally just wanted to quietly grow a few plants in your wardrobe, but now you’re forced to build a complex HVAC system. Equipment costs skyrocket, and where’s the room left for your plants? This vicious cycle makes HID lights and closets a complete mismatch from the start. No matter how much a seller hypes its light efficiency, if your grow space is a closet, stay far away from HID.
Making the Smart Choice: 4 Key Factors to Consider
Now you know the personality of each light type, but knowing what’s out there isn’t enough — we still need to tackle how to choose. Facing all those dizzying specs and marketing claims, without a clear decision-making framework, it’s easy to get led by the nose. I’ve distilled the decision logic from plenty of hands-on closet growing experience into four key questions you must run through before you click “buy.” These four factors cover everything from spatial fit to long-term costs, from daily user experience to final results. Think them through one by one, and the light you pick will likely be one you won’t regret.
Factor 1: Light Coverage, Not Just Wattage
This is the biggest trap for beginners: treating wattage as the only measure of a grow light’s power. High wattage simply means it uses more electricity; it doesn’t directly tell you that it covers a wide area evenly. The core metric you should care about is effective light coverage — how large an area can this light illuminate with enough intensity to support healthy, vigorous plant growth?
Think of your grow light like a shower head. A good shower head evenly drenches your whole body with warm water, rather than scalding one small spot on your head while your shoulders stay cold. Plant lights are the same: your goal is to provide an “even light bath” across your entire growing area, not to create a blinding central hot spot. So go back to the closet dimensions you measured in step one, and look for lights that clearly state “suggested coverage area” or “light footprint” in their specifications. Match that coverage to your actual usable closet area. If you can’t find a perfect match, having a light that covers slightly more area is acceptable, but going way overboard means light spills onto walls and gets wasted — and it actually adds to your heat buildup problem.
Factor 2: The Spectrum Story – Blue for Leaves, Red for Flowers
The word “spectrum” might sound academic, but the idea behind it is beautifully simple. Sunlight is actually a blend of various colors of light, and at different life stages, plants have clear preferences for different colors.
Simply put, blue light helps plants build their vegetative structure. When they’re seedlings frantically growing roots and leaves, plenty of blue light keeps them stocky with tight internodes, instead of long, weak, and spindly. Later, when they enter the flowering and fruiting stage, red light takes center stage, effectively stimulating bud formation and fruit swelling. Once you understand this, you’ll see why almost everyone now recommends that closet beginners go straight to a full-spectrum LED grow light. A quality full-spectrum light already has blue and red light mixed in a scientifically balanced ratio. You don’t need to swap bulbs or tubes halfway through the grow cycle. One light runs from seed to harvest. The plants will simply “pick” the colors they need from that full spectrum at each phase. For first-timers, this is the most friendly and foolproof approach.
Factor 3: The Hidden Cost of Ownership
Whether something is expensive isn’t just the number you see when you swipe your card. The same goes for buying a grow light — you have to learn to calculate the “total cost of ownership.” There are at least three layers to this bill, and most people only see the first one.
The first layer is the purchase price, your upfront investment. LEDs are typically the most expensive, and fluorescent lights are much cheaper — that’s the obvious part. The second layer is the electricity cost, which is ongoing. A 100-watt LED running 12 hours a day might only cost a few dollars a month in most parts of the country. An older light type delivering the same brightness could cost two or three times as much. After a month or two, you might not notice the gap, but a full grow cycle usually takes several months. Over that time, the difference in electricity bills can easily erase the initial price gap of the fixture. When judging whether an LED is “too expensive,” stretch your timeline. The third layer is maintenance and repair costs. As mentioned, a dead fluorescent tube costs a few bucks and you’re done. But if a core component on an LED panel fails, you have to factor in return shipping and downtime. Of course, a quality LED has a very long lifespan, so the probability is low. Putting these three layers together gives you a more three-dimensional view of cost, so you can make trade-offs based on your budget and preferences.
| Cost Type | LED Grow Lights | Fluorescent Lights (T5/CFL) |
|---|---|---|
| Initial Purchase Cost | Higher, a larger one-time investment | Lower, beginner-friendly entry price |
| Daily Electricity Cost | Low, high energy efficiency, just a few dollars a month | Moderate, slightly higher power draw for the same brightness |
| Maintenance & Replacement Cost | Low frequency but high cost (whole panel repair) | High frequency but low cost (swap and go) |
| Long-Term Ownership Cost | More economical in the long run | Cheaper in the short term, suits budget-limited growers |
Factor 4: The “Set It and Forget It” Factor
This final factor is about whether your growing experience feels relaxed or anxious. Plants aren’t like pets; you can’t ask them every day, “How’s the light feeling?” They need an incredibly stable light rhythm. Turning the light on an hour early one day and an hour late the next interferes with their biological clock and can seriously mess up flowering or cause weird growth patterns.
So I strongly suggest you make automation a key part of your selection criteria. Either the light itself comes with a built-in timer function, or it’s fully compatible with an external mechanical or digital light timer. Hand over the on/off duty completely to a timer. You set it once — say, a 16-hours-on, 8-hours-off cycle — and then you can truly forget about it. A stable, reliable light cycle is the metronome for healthy plant growth. Spending a few bucks on a timer buys you months of peace of mind. The return on that tiny investment is much bigger than you think.
Pro-Tips for Getting the Most Out of Your Closet Light
You’ve picked your light, mounted it, and set the timer — so is it all smooth sailing from here until harvest? Not so fast. Having the hardware in place is just step one. The same light can produce wildly different results in different hands. The gap isn’t in the light itself, but in a handful of subtle techniques during use. The three pro-tips I’m about to share come from the hard-earned lessons of countless closet-growing veterans. They don’t require you to spend any extra money, but they have a huge impact on your final yield. Weave these tricks into your daily routine, and your light will truly be working at its full potential.
The Art of Adjustable Height
When hanging a plant light, the worst thing you can do is fix it to the ceiling at one height and never move it again. Plants grow; the distance between them and the light is a dynamic, ever-changing relationship. So when you install your fixture, make sure you use adjustable grow light hangers — those ropes or ratchet pulleys designed for this purpose. The ratcheting kind is especially handy; one hand pulls and releases to give you precise height control.
A very practical insider tip: during those first few days after seedlings push through the soil, keep the light slightly lower than normal. The extra intensity keeps them squat and prevents them from desperately stretching into weak, floppy “bean sprouts.” This early stage is a critical control window for your plant’s final shape. Later, as your plants enter the vigorous vegetative phase and the canopy fills out, raise the light promptly to leave a safe distance for the tender top leaves and avoid light burn. There’s no universal rule for safe distance, but you can do the back-of-the-hand test: hold your hand at canopy level for 30 seconds. If your hand feels noticeably hot, it’s time to move the light up.
Don’t Underestimate the Power of Reflection
Your light works hard to produce all those photons, but a significant portion scatters sideways. If your closet walls are dark wood or light-absorbing wallpaper, that precious light just gets swallowed and wasted. To squeeze near 120% effectiveness out of your setup, you only need to do one simple, cheap thing: turn the inside of your closet into a highly reflective grow room wall.
The ideal solution is to repaint the interior with matte white latex paint, or apply a purpose-made reflective grow film. Matte white gives a soft, even reflection that bounces light onto the sides and lower leaves of your plants. If you don’t want to paint, buying a roll of white-on-black “panda film” and lining the walls is another fantastic choice.
Now, here I have to loudly emphasize a classic mistake many DIY-enthusiasts make: never use kitchen aluminum foil to line your grow closet walls! Aluminum foil creates irregular crinkles that reflect light into chaotic, focused “hot spots.” These hot spots hitting your leaves act like a magnifying glass in the sun, easily scorching crispy burn marks into the foliage. Plus, foil can trap moisture and breed mold in a humid environment, which is totally counterproductive. Stick with matte white. It’s the most reliable, low-tech, and high-efficiency trick proven by countless growers.
Let Your Plants Be the Final Judge
After all these numbers and tips, here’s what I want to leave you with: no guide, no expert’s advice, can beat the information your own plants tell you directly. Plants don’t lie. Their stems and leaves are a real-time “info screen” constantly giving you feedback on whether your lighting environment is right. You need to learn to read the two most visual “protest signals” they send.
The first signal is called leggy growth or stretching. If you notice the spaces between nodes on the stem becoming unusually long, and the whole plant looks tall, thin, and weak with pale leaves, it’s clearly telling you: “I’m craving more light!” In that case, lower your light a bit or, if your fixture supports it, slightly increase its brightness. The second signal is light burn. Look at the very top leaves closest to the light. If their edges start curling upward, turning yellow, or becoming dry and crispy, they’re screaming: “Too close! Too hot!” Don’t hesitate — immediately raise the light and double-check that your closet ventilation is flowing smoothly.
The specs and numbers are there for reference when you’re shopping. Once the light is on and the plants are growing, you have to learn to set those numbers aside. Use your eyes to observe and your intuition to adjust. When you can skillfully tweak your light height and duration based on how your plants look, you’ve officially moved beyond being a rookie who just follows a manual. At that stage, you’re harvesting not just a few plants, but a real, deeply personal fingertip feel for growing — and that’s the most fascinating part of this whole closet gardening journey.
Final Thoughts
When it comes down to it, picking the best closet grow light isn’t about how deep your pockets are — it’s about how deeply you understand the little world inside that closet of yours. Measure your space accurately, get real about your heat situation, and then find the light type among the three main players that fits your actual reality. Weigh your decision with those four key factors: coverage area, light spectrum, true long-term cost, and timer automation. After the light is up, don’t forget to use those two free magic weapons — adjustable hanging height and simple reflective walls. After that, leave the rest to your plants. They’ll show you the answer.
CATEGORIES
Recommended Post
Where It’s Legal to Grow Cannabis: Ultimate Tips & Cultivation Laws
About Author—Jose Li
Jose, a senior content creator at BATA LED, brings over 5 years of expertise in LED grow light. He delivers valuable insights to help growers and farmers better understand LED grow light technology, empowering them to boost crop yields and quality with advanced lighting solutions.